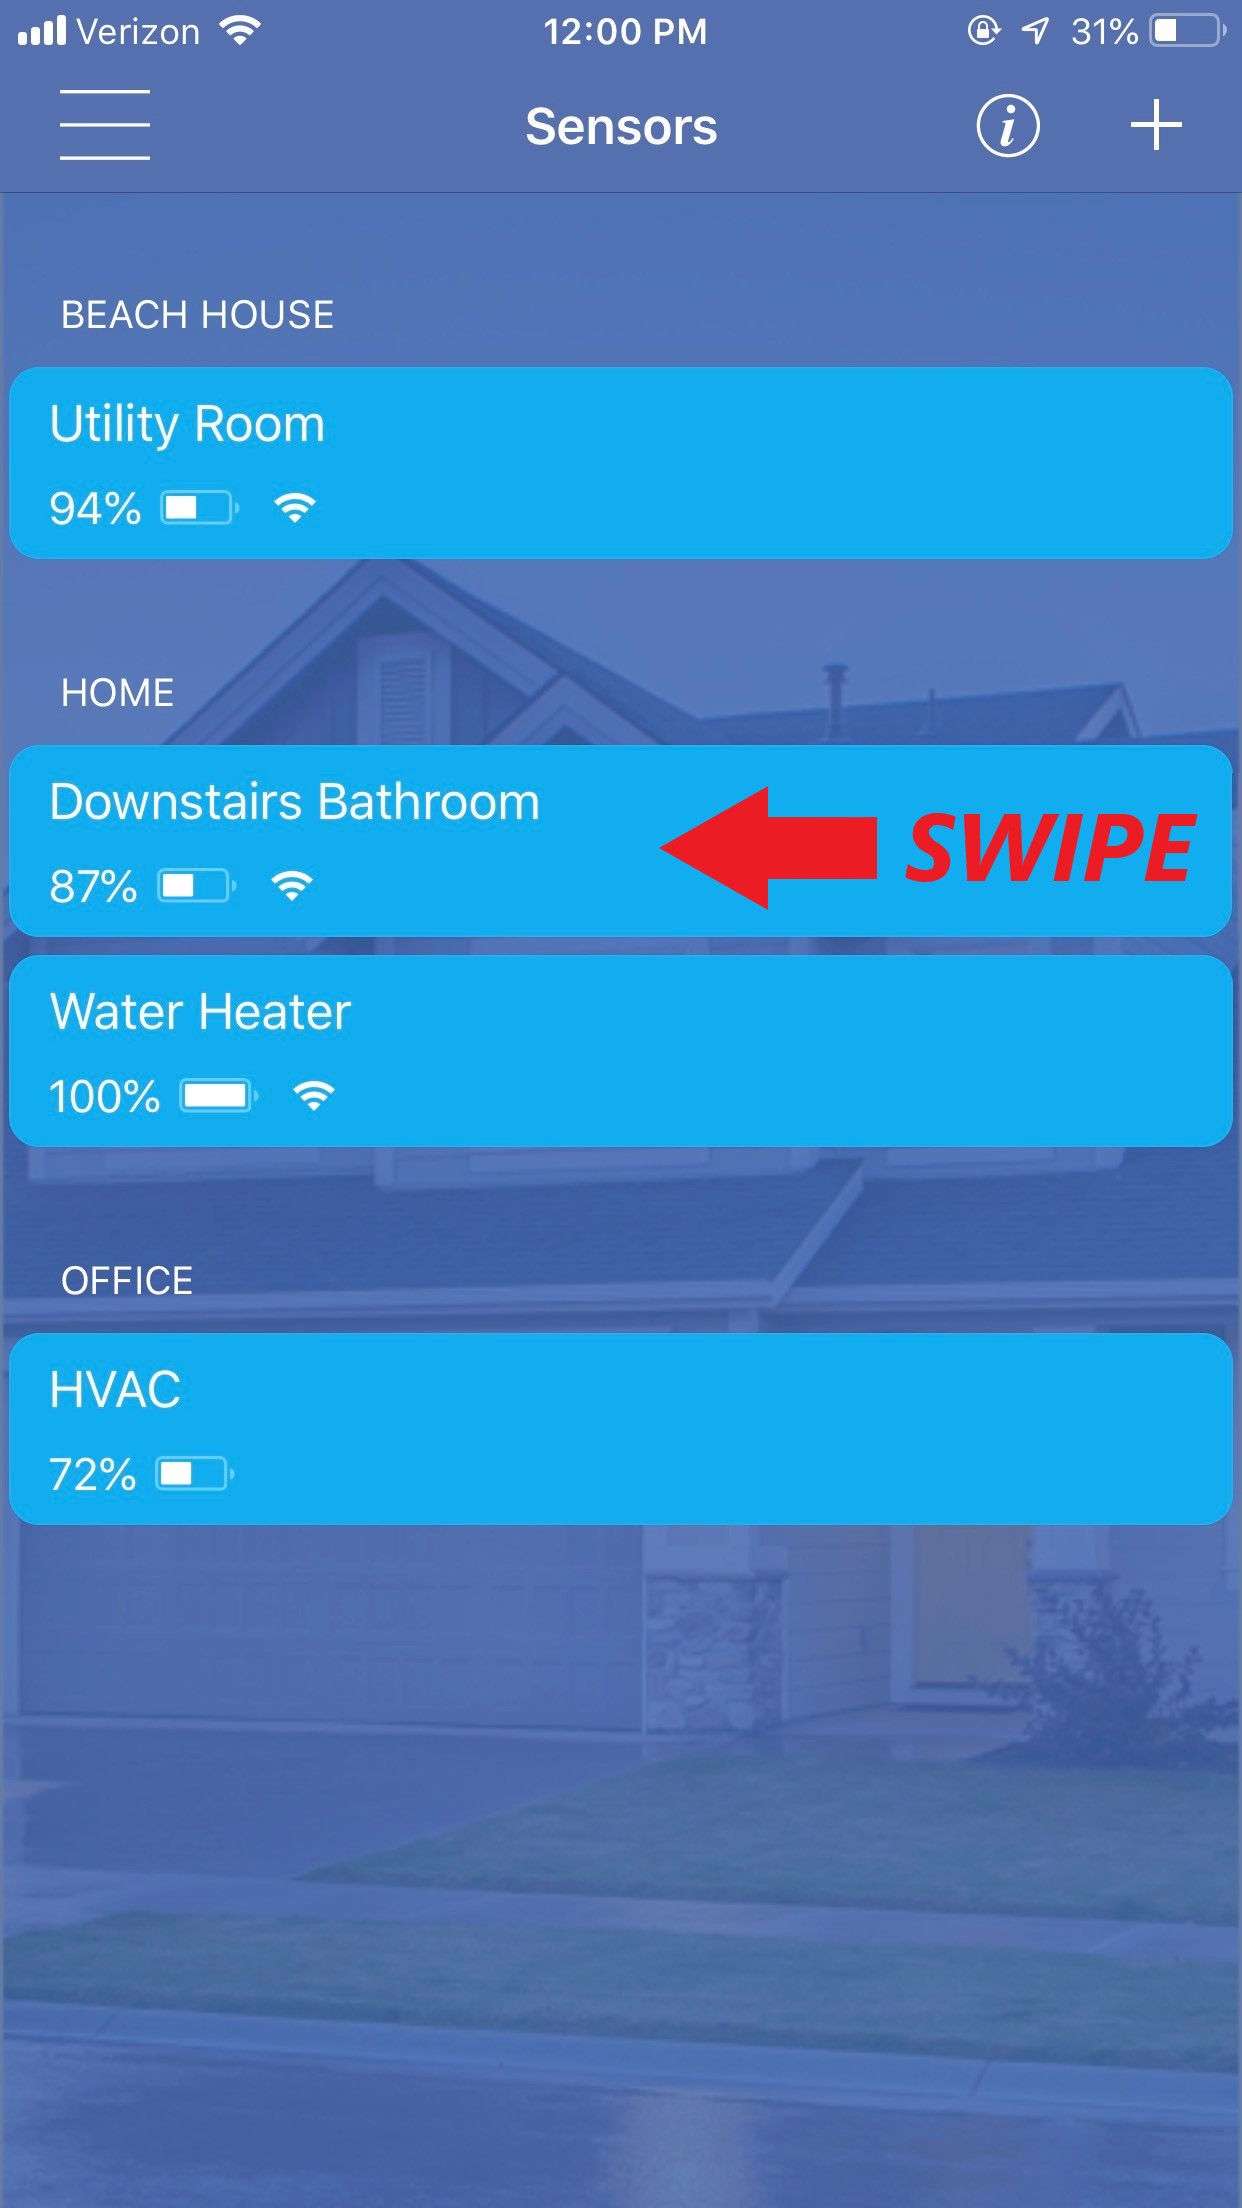
1. Open the SimpleSence mobile app to the page titled “Sensors”. This page will display all your active sensors and their details. Use the locations and descriptions you assigned during installation to find the sensor you want to delete.
2. This step is slightly different for Android and iOS users:
iOS
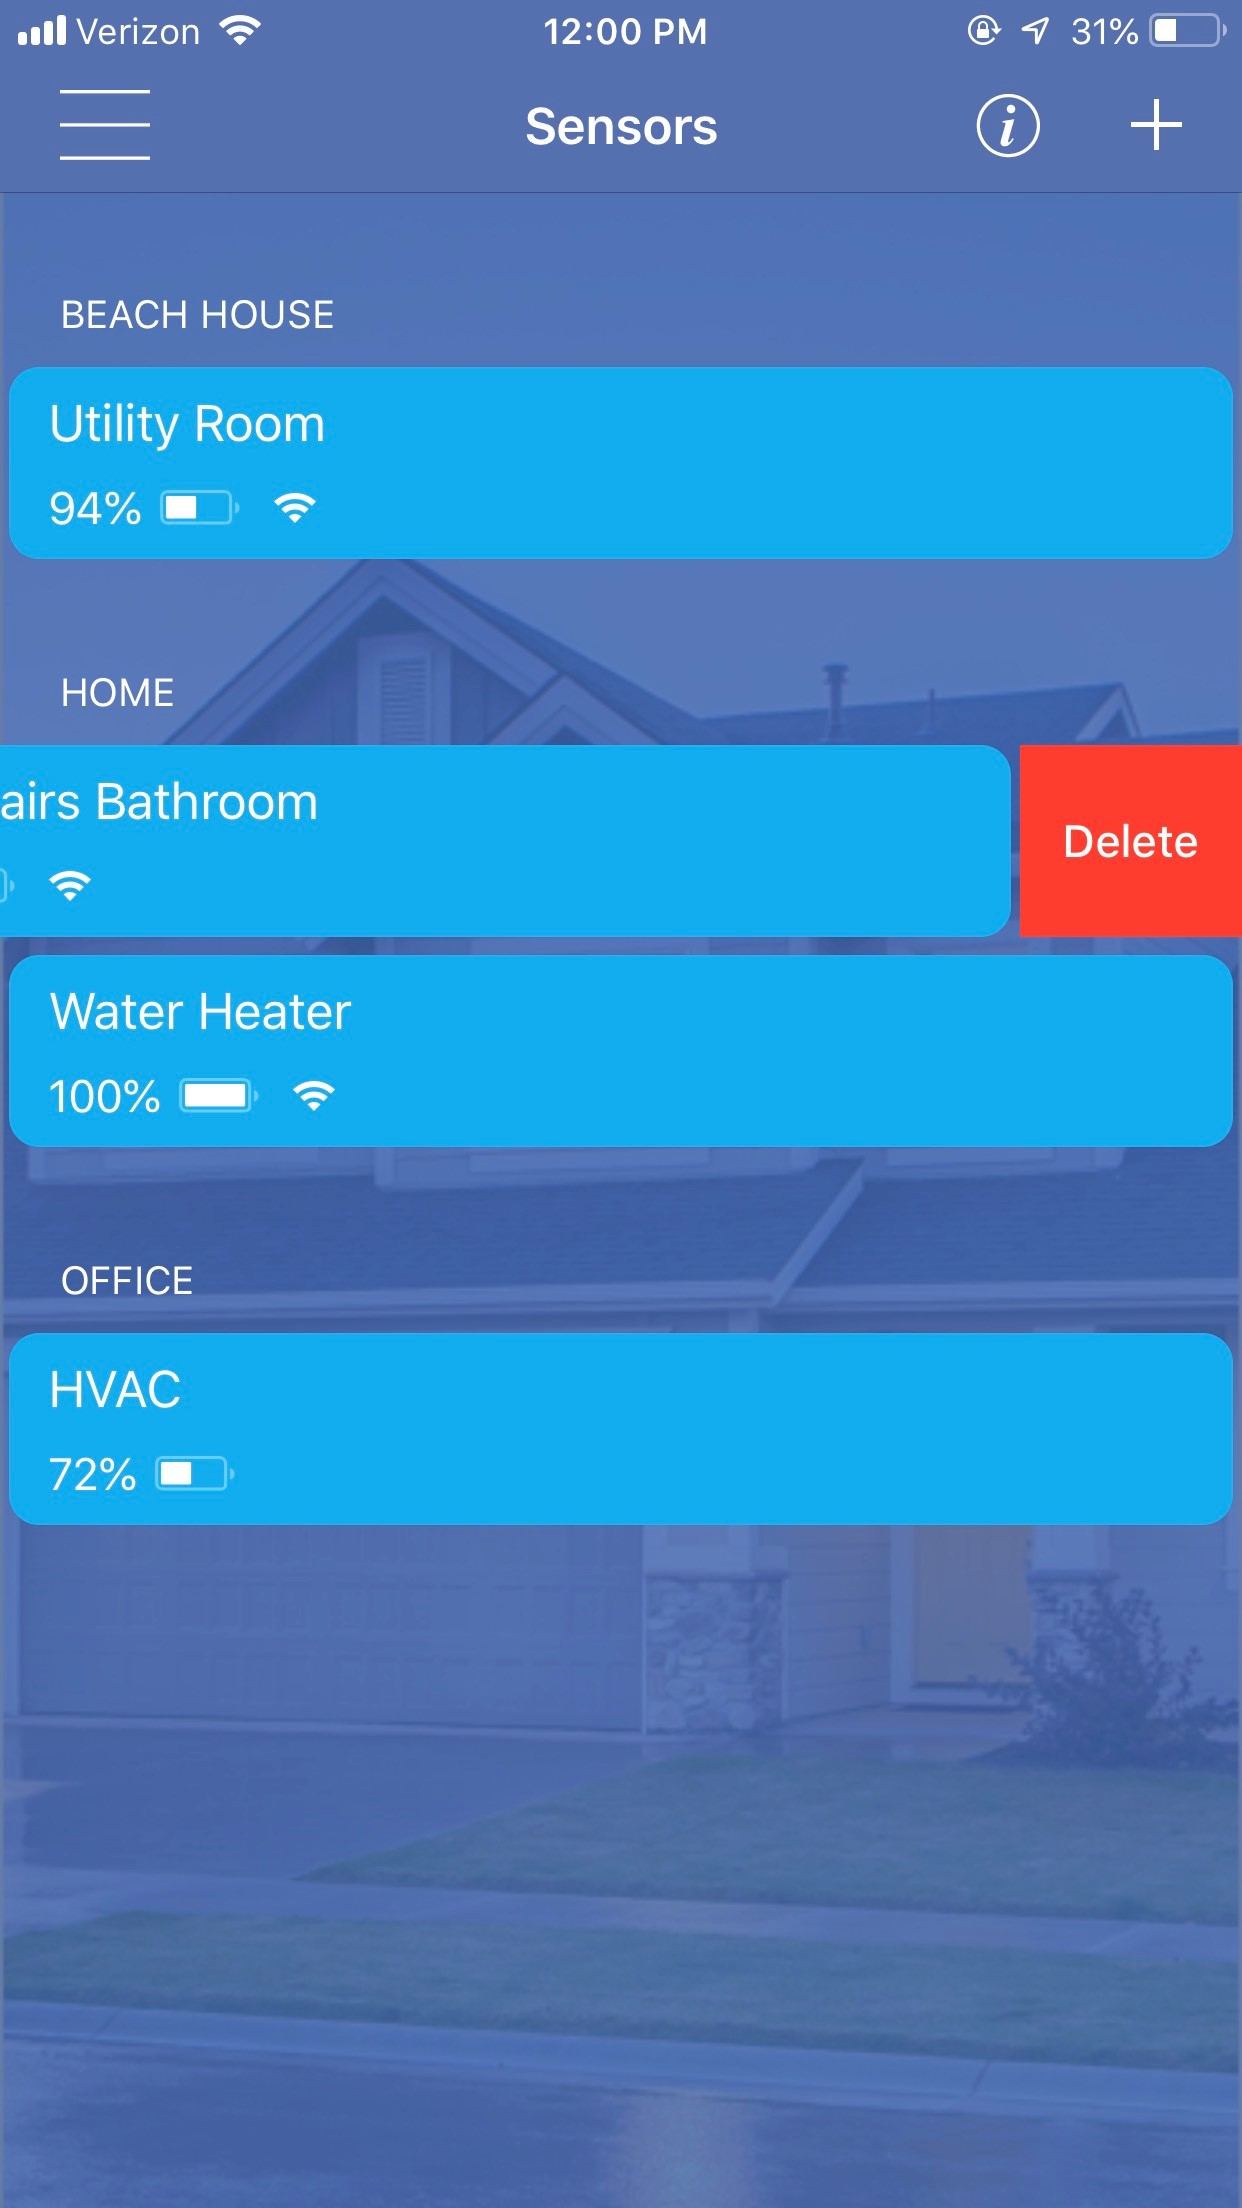
Once you have found the correct sensor within the app using the custom location and description settings you assigned to it, swipe left anywhere on the blue box around that sensor. You should see a red box pop up on the right side of your screen that says “Delete” – select this and then choose “Yes” to confirm that you want to delete the sensor.


Android
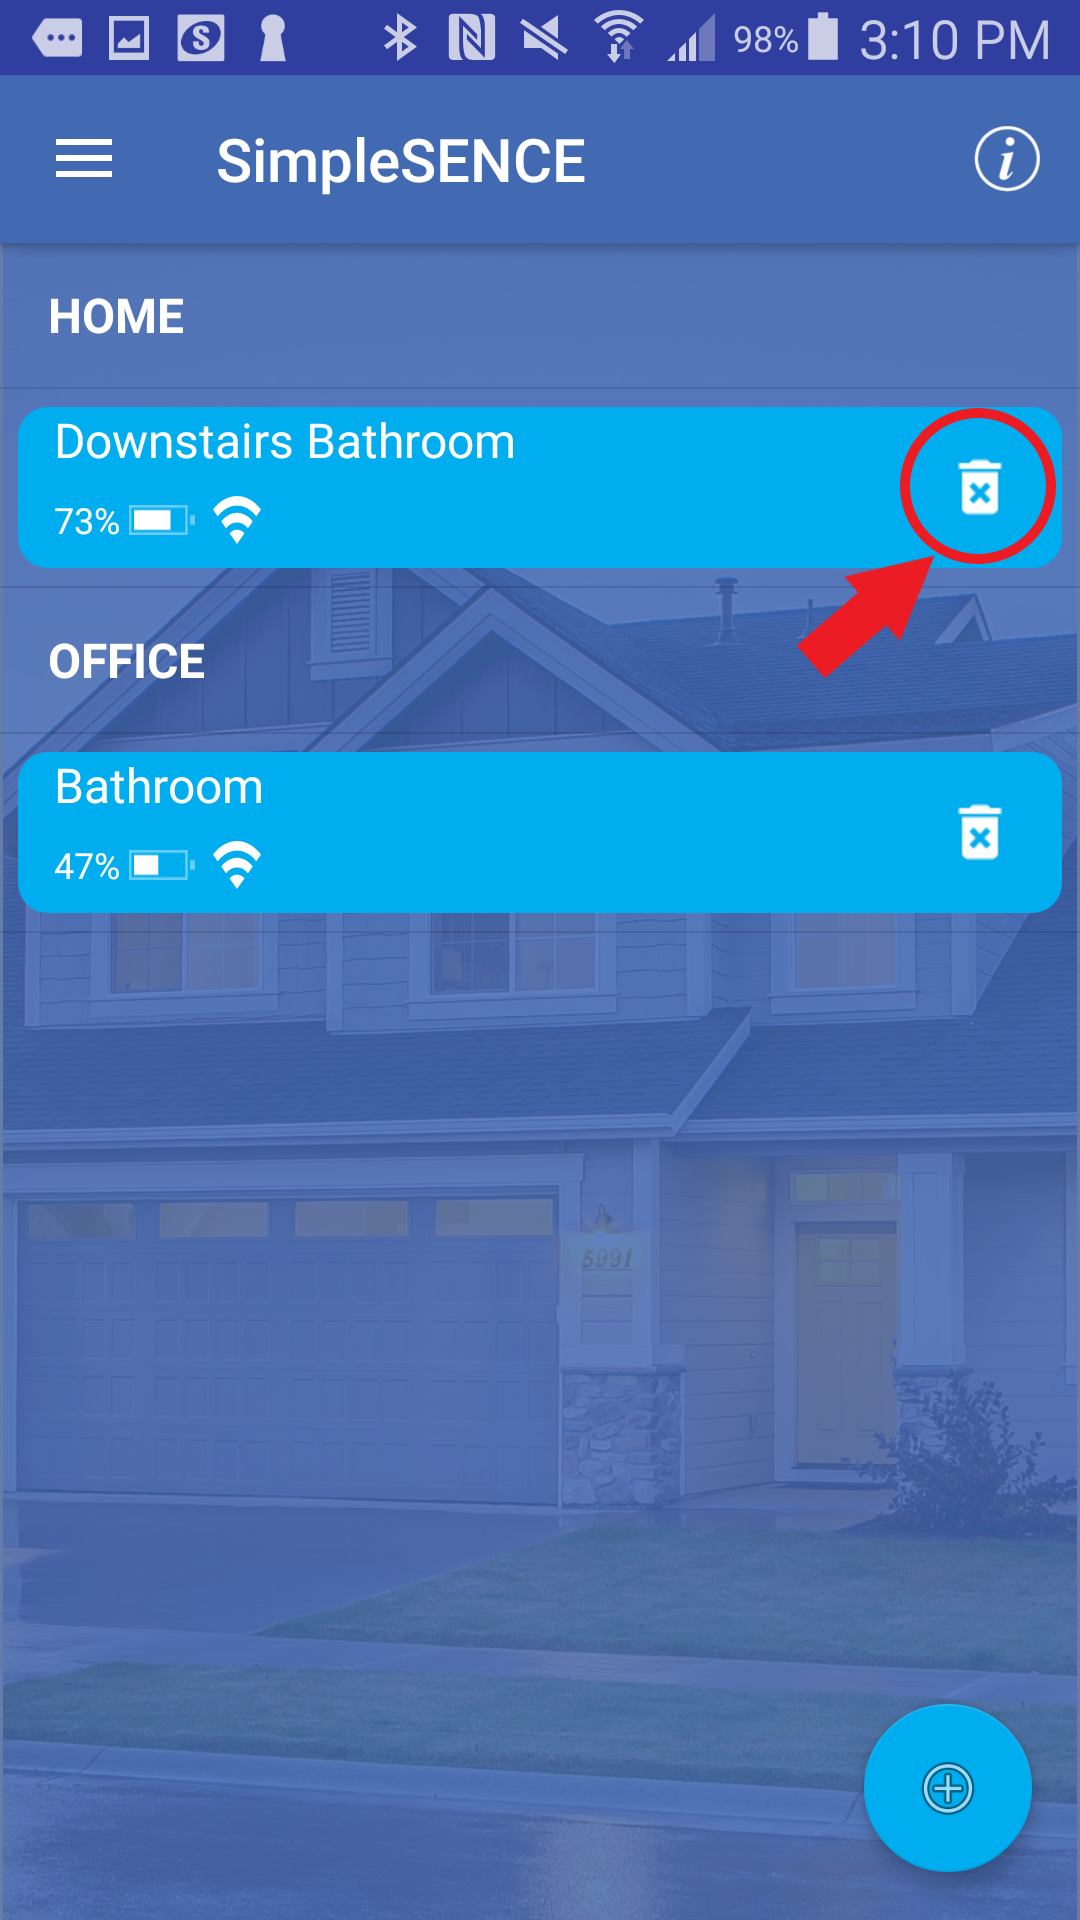
Once you have found the sensor within the app, you will see a trash can symbol in the far-right portion of the blue box for that sensor. Select this trash can, then when a confirmation message appears, select “Remove” to confirm that you want to delete the sensor.

Double check that the sensor you deleted is no longer displayed on the “Sensors” screen in the app.
Deleting or "removing" a sensor using the mobile app clears all data for that sensor and completely removes it from your app. Once it’s deleted the sensor will not retain any of your information and it won’t send you any notifications.
The deleted sensor can be installed again at any time. To set it up again simply press the "+" button to start installation and follow the in-app directions.
WARNING: Deleting the entire app will NOT stop notifications from being sent. To stop all notifications you should delete each of your sensors before deleting the app from your smart device.
Comments
0 comments
Please sign in to leave a comment.